
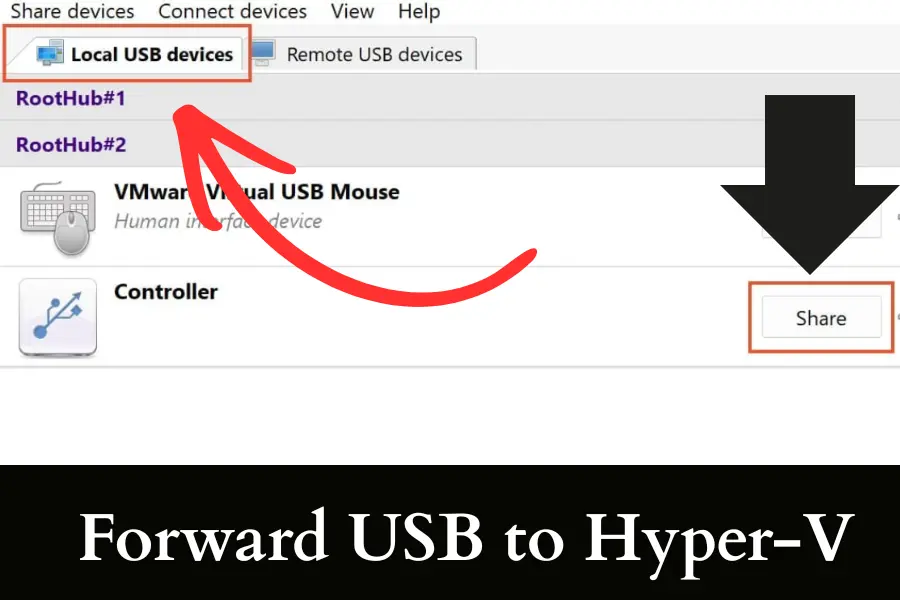
Forward USB to Hyper-V: 5 Simple Methods (Step-by-Step)
Forward usb to hyper v is not as direct as you might expect. Luckily, there are simple ways to make it work. Hyper-V does not support native USB passthrough, so you need to use methods like:
- Enhanced Session Mode
- Remote Desktop redirection
- Disk passthrough
If you have ever plugged in a USB and wondered why your VM cannot see it, you are not alone. I have faced the same confusion while setting up test environments and client systems. Once you understand how Hyper-V handles hardware, everything starts to make sense.
Here, I will walk you through real methods that actually work in daily use, not just theory.
Key Takeaways
- Hyper-V does not support direct USB passthrough
- Enhanced Session Mode is the easiest method for beginners
- Remote Desktop redirection works best for most users
- Disk passthrough gives full access to USB storage
- Network sharing is simple and very stable
- Third-party tools solve complex USB issues
- Linux VMs have more USB limitations in Hyper-V
- Choosing the right method depends on your device
How to Forward USB Devices to Hyper-V Virtual Machines
You cannot directly forward USB devices in Hyper-V because it does not support native USB passthrough. Instead, you can access USB devices using Enhanced Session Mode or Remote Desktop redirection. You can also attach USB drives as physical disks or share them over the network. For advanced needs, third-party tools can simulate USB passthrough reliably.
Method 1: Use Enhanced Session Mode
Enhanced Session Mode is the easiest way to access USB storage devices in Hyper-V. It works by using Remote Desktop Protocol in the background, so your virtual machine can interact with local devices like drives and printers without complex setup.
This method is built into Hyper-V and does not require extra software.
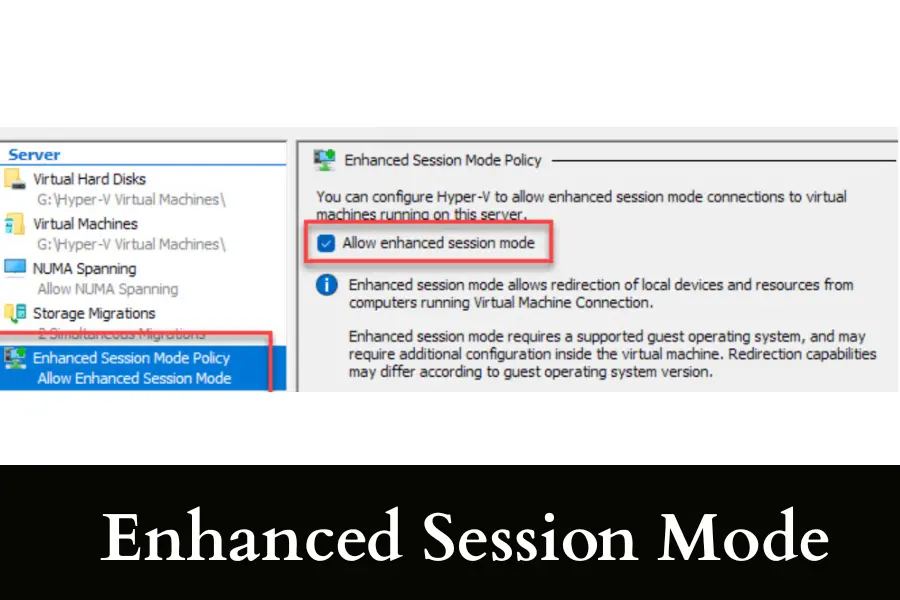
To use it, you first enable Enhanced Session Mode in Hyper-V settings on your host machine. Then you start your virtual machine and connect using the enhanced session option.
During connection, you will see an option to select local resources. Here you can choose USB drives and other supported devices to share with the virtual machine.
Method 2: Use Remote Desktop USB Redirection
Remote Desktop redirection is the most practical and widely used method. Hyper-V uses RDP technology internally, which allows you to redirect USB devices into the virtual machine session. This method works even when Enhanced Session Mode feels limited.
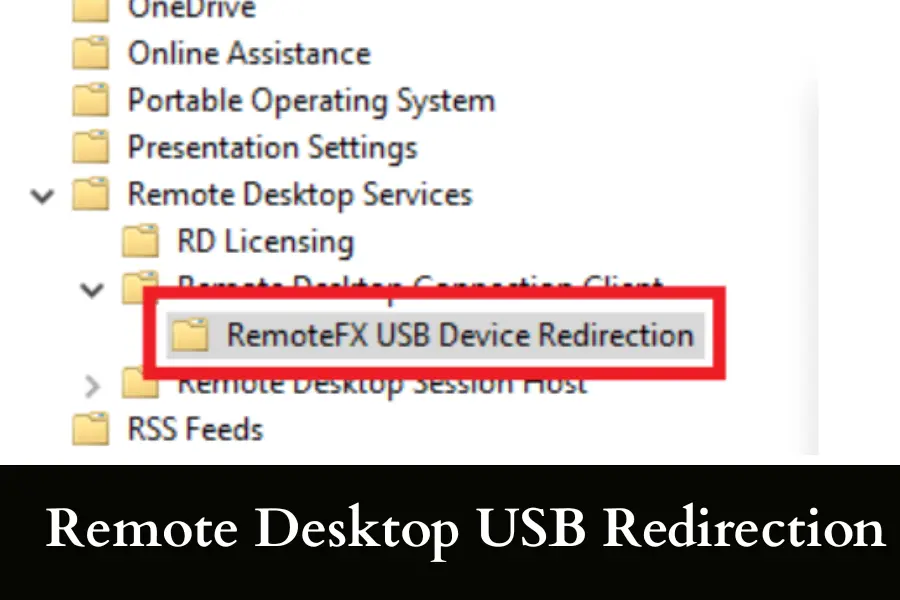
You connect to your virtual machine using Remote Desktop instead of the default console. Before connecting, you open the Local Resources tab and click on More. Then you select the USB devices or drives you want to use inside the virtual machine. Once connected, those devices appear as if they are plugged directly into the VM.
This method is reliable for USB storage devices and printers. However, it may not work well for complex USB devices like license dongles or hardware programmers. In real-world setups, this is the method most IT professionals rely on because it balances simplicity and functionality without needing advanced configuration.
Method 3: Attach USB as a Physical Disk
This method is more advanced but very powerful for USB drives. Instead of forwarding the USB device itself, you attach the entire USB storage as a physical disk to the virtual machine.

You start by plugging in the USB drive and opening Disk Management on the host machine. Then you set the USB disk to offline mode so the host stops using it. After that, you go into Hyper-V settings for your VM and add the disk under the SCSI controller as a physical hard disk.
Method 4: Share USB Over Network
Sometimes the smartest solution is not direct forwarding. You can share your USB device over the network and then access it inside the virtual machine.
This method is simple and surprisingly effective for many everyday use cases.
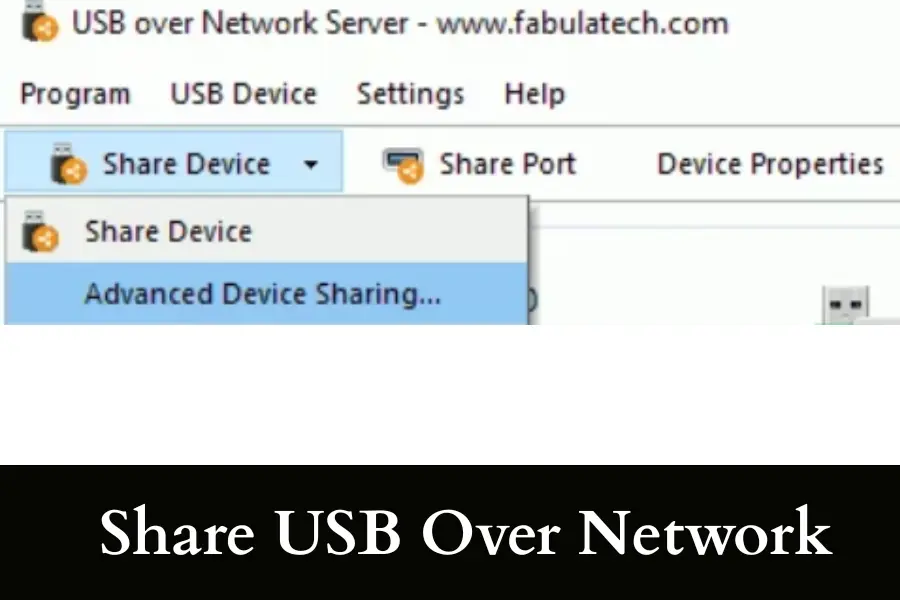
You plug the USB into your host machine and enable file sharing for that drive. Then, inside the virtual machine, you connect to the shared folder using the network path.
Method 5: Use Third-Party USB Redirection Tools
When you need full USB functionality, third-party tools are the most reliable option. Hyper-V does not support native USB passthrough, so these tools create a bridge over the network that makes USB devices appear directly connected to the virtual machine.
Tools like USB Network Gate and FlexiHub are commonly used in professional environments. They allow you to forward almost any USB device, including security dongles and specialized hardware, with minimal compatibility issues.
It is not free, but it solves problems that built-in methods cannot handle.
If your workflow depends on reliable USB access, this is the solution that actually works without constant troubleshooting.
Does Hyper-V Support Native USB Passthrough or Not?
Hyper-V does not support native USB passthrough, and this is one of the most misunderstood limitations of the platform. Unlike other virtualization solutions, Hyper-V is designed with a focus on enterprise security and stability, which changes how hardware access is handled. Instead of allowing direct USB access, it relies on controlled methods like Remote Desktop redirection and virtualized devices.
The main reason behind this design is isolation. Hyper-V keeps the host and virtual machines separated at a deeper level to prevent conflicts and security risks. Direct USB passthrough could break this isolation, especially with unpredictable or low-level USB devices.
If you’re looking to buy a laptop, then I have something you will like to read. Check out the Jumper Laptop review and find out if this is the device you should buy next.
Why USB Devices Do Not Appear in Hyper-V Virtual Machines
USB devices do not appear in Hyper-V because it does not support direct passthrough. Most issues happen due to incorrect connection methods or unsupported device types. In many cases, the USB is working on the host but not properly redirected to the virtual machine.
| Reason | Detailed Explanation |
| No Native USB Passthrough | Hyper-V does not allow direct USB hardware access, so devices will not show unless redirected properly through supported methods. |
| Enhanced Session Mode Disabled | If this mode is off, the VM cannot access local drives and USB devices through built-in redirection. |
| Using Basic VM Console | The default Hyper-V console does not support USB redirection, which causes devices to remain invisible. |
| Unsupported USB Device Type | Devices like dongles or specialized hardware often fail because they require low-level access not provided by Hyper-V. |
| RDP Redirection Not Enabled | If USB devices are not selected in Remote Desktop settings, they will not appear inside the VM. |
| Host Still Using the USB | When the host system is actively using the USB, it cannot be accessed by the virtual machine simultaneously. |
| Driver Issues in Guest OS | Missing or incorrect drivers inside the VM can prevent the USB device from being recognized. |
Enable Enhanced Session Mode for USB Redirection Easily
Enhanced Session Mode is the simplest way to use USB drives inside a Hyper-V virtual machine. It works by using Remote Desktop Protocol in the background, which allows your VM to access local resources without direct USB passthrough.
This is the first method I always recommend because it is built into Hyper-V and does not require extra setup.
To enable it, open Hyper-V Manager on your host machine. Go to Hyper-V Settings and turn on Enhanced Session Mode under both Server and User sections. This step is important because many people only enable one side and then wonder why it does not work. Once enabled, start your virtual machine normally.
When you connect to the VM, Hyper-V will show a connection window before login. Here, you must click on “Show Options” and go to Local Resources. Then select the drives or devices you want to share.
From real experience, this method works best with USB flash drives and basic storage devices. It does not work well with complex USB hardware like license dongles.
If your device is not showing, double-check that your guest operating system supports Enhanced Session Mode and that you selected the correct resources during connection.
Step by Step Guide to Redirect USB via Remote Desktop
Remote Desktop redirection allows you to forward USB devices into a Hyper-V VM by connecting through RDP instead of the default console. This method is reliable and works for most storage devices and printers when configured correctly.
- Open Remote Desktop Connection on your host machine
- Enter the IP address or name of your virtual machine
- Click on “Show Options” before connecting
- Go to the “Local Resources” tab
- Click on “More” under Local devices and resources
- Select the USB drives or devices you want to redirect
- Click OK and then connect to the VM
- Access redirected devices inside the VM through File Explorer
How to Use USB Storage Devices with Hyper-V Disk Pass
Disk passthrough allows you to attach a USB drive directly to a virtual machine as a physical disk. This method gives better performance and full access to the storage but requires careful setup to avoid data conflicts.
- Insert the USB drive into the host machine
- Open Disk Management on the host
- Locate the USB disk and right-click to set it Offline
- Open Hyper-V Manager and go to VM Settings
- Select SCSI Controller and choose “Add Hard Drive”
- Select “Physical hard disk” and choose your USB disk
- Start the virtual machine
- The USB will appear as a local disk inside the VM
Using Discrete Device Assignment for USB in Hyper-V
Discrete Device Assignment, also known as DDA, is an advanced method that allows direct hardware access to a virtual machine. It is designed mainly for GPUs and PCIe devices, but some USB controllers can also be passed through using this approach.
The key idea is that instead of passing a single USB device, you pass the entire USB controller to the virtual machine. This gives the VM full control over any device connected to that controller. Because of this, the host system loses access to that controller completely. This is something many users do not realize until it is too late.
To use DDA, your system must support virtualization extensions and have compatible hardware. You also need to use PowerShell commands to dismount the device from the host and assign it to the VM. There is no simple graphical interface for this process, which makes it harder for beginners.
From my experience, DDA is rarely used for simple USB needs. It is mostly used in enterprise environments where specific hardware must run inside a virtual machine with full control. If you only need USB storage or basic devices, other methods are much easier and safer.
Best Third Party Tools for Hyper-V USB Redirection
Third-party tools solve the biggest limitation of Hyper-V by creating true USB over network connections. These tools allow almost any USB device to work inside a virtual machine, including complex hardware that built-in methods cannot handle.
| Tool Name | Best For | Key Features | Ease of Use |
| USB Network Gate | General USB redirection | Supports most USB devices, stable connection | Easy |
| FlexiHub | Remote teams and cloud setups | Works over internet, secure sharing | Easy |
| VirtualHere | Advanced users | Lightweight, high performance | Moderate |
| AnyplaceUSB | Hardware-based solution | Plug and play USB over network | Easy |
Fix USB Not Working in Hyper-V Virtual Machine Issues
If your USB device is not working in Hyper-V, the problem is usually related to configuration or limitations rather than hardware failure.
- Check if you are using Enhanced Session Mode instead of basic console
- Make sure you selected USB devices in Local Resources before connecting
- Verify that your guest OS supports redirection features
- Confirm the USB device is not actively used by the host system
- Restart the VM after enabling redirection settings
- Install proper drivers inside the virtual machine
- Try Remote Desktop method instead of Enhanced Session Mode
Hyper-V USB Passthrough Limitations You Must Know
Hyper-V has clear limitations when it comes to USB passthrough, and understanding them will save you hours of frustration. The biggest limitation is that it does not support native USB passthrough at all. This means you cannot directly attach a USB device to a virtual machine the way you can in other virtualization platforms.
Here are the rest:
- Limited compatibility with complex USB devices
- Requires workarounds like RDP or network sharing
- Performance can be slower due to redirection layers
- Cannot share USB between host and VM simultaneously in passthrough methods
- Advanced methods like DDA require specific hardware
- Troubleshooting can be time-consuming and confusing
- Not ideal for environments relying heavily on USB hardware
Which USB Devices Work Best with Hyper-V Redirection
| USB Device Type | Works Well | Notes |
| USB Flash Drives | Yes | Best compatibility with all methods |
| External Hard Drives | Yes | Works well with disk passthrough |
| USB Printers | Yes | Reliable with RDP redirection |
| USB Keyboards/Mouse | Limited | Usually handled by host |
| Security Dongles | No | Often fails without third-party tools |
| Development Boards | No | Requires direct hardware access |
Hyper-V vs VMware USB Passthrough Key Differences
Hyper-V does not support native USB passthrough, while VMware provides built-in direct USB access. VMware allows easy connection of USB devices to VMs, but Hyper-V relies on indirect methods like RDP or third-party tools.
| Feature | Hyper-V | VMware |
| Native USB Passthrough | No | Yes |
| Ease of Use | Moderate | Easy |
| Device Compatibility | Limited | High |
| Setup Complexity | Higher | Lower |
| Best For | Enterprise stability | Flexible USB usage |
Forward usb to hyper v windows 10
Forwarding USB to Hyper-V on Windows 10 is not direct because native USB passthrough is not supported. You need to use indirect methods that are built into the system. Start by enabling Enhanced Session Mode in Hyper-V settings. Then launch your virtual machine and connect using the enhanced option.
During connection, select the USB drives you want to share. This step is important because the devices will not appear automatically inside the VM.
In real use, this method works best for flash drives and external storage. If you need more flexibility, you can use Remote Desktop redirection instead. For advanced setups, third-party tools are often used. From experience, most Windows 10 users solve their USB issues by simply using Enhanced Session Mode correctly.
Hyper v usb passthrough to linux vm
Using USB devices in a Linux virtual machine on Hyper-V is more limited compared to Windows guests. Enhanced Session Mode does not fully support Linux in most cases, so you cannot rely on the same easy setup. This is where many users get confused and think something is broken.
The most practical method is to use network sharing or third-party USB redirection tools. You can plug the USB device into the host and share it over the network. Then access it inside your Linux VM like a shared folder. This works well for storage devices.
If you need direct USB access for tools or hardware, third-party software becomes necessary. In real-world setups, developers working with Linux often switch to tools that support USB better or use dedicated solutions. Hyper-V can work, but you need to choose the right method based on your device.
How to connect usb to virtual machine hyper v
You start by enabling Enhanced Session Mode in Hyper-V settings. Then open your VM and choose the devices you want to share before logging in. This allows USB drives to appear inside the virtual machine without extra configuration.
Another reliable method is Remote Desktop redirection. You connect to the VM using RDP and select USB devices under local resources. For storage devices, disk passthrough is also an option. From practical experience, choosing the right method depends on the type of USB device you are trying to use.
Hyper v usb passthrough software
Hyper-V USB passthrough software is used when built-in methods are not enough. Since Hyper-V does not support direct USB passthrough, these tools create a bridge that makes USB devices appear connected to the virtual machine over a network.
Popular tools like USB Network Gate and FlexiHub are widely used in professional environments. They support a wide range of USB devices, including dongles and specialized hardware.
Virtualbox usb passthrough
VirtualBox supports native USB passthrough, which makes it much easier to use USB devices inside virtual machines. Unlike Hyper-V, you can directly connect a USB device to a VM without using workarounds.
You simply install the VirtualBox Extension Pack and enable USB support in the VM settings. Then you select the USB device you want to attach. Once the VM starts, the device is recognized as if it is physically connected.
From experience, this is one of the biggest advantages of VirtualBox. It works well with a wide range of devices, including flash drives, dongles, and development boards. If your work depends heavily on USB hardware, VirtualBox is often a more convenient choice than Hyper-V.
Hyper v usb passthrough zigbee
Using a Zigbee USB device in Hyper-V can be challenging because these devices require low-level hardware access. Hyper-V does not support native USB passthrough, which makes direct connection difficult.
The most common solution is to use third-party USB redirection software or move the Zigbee device to a network-based hub. Some users also run Zigbee services on the host machine and connect to them from the virtual machine instead of passing the USB directly.
In real setups, many smart home users avoid Hyper-V for Zigbee devices unless they use dedicated tools. The issue is not with the Zigbee device itself but with how Hyper-V handles USB. Choosing the right workaround is key to making it work reliably.
Hyper v usb passthrough windows 11
Forwarding USB devices in Hyper-V on Windows 11 works the same way as Windows 10, with no native passthrough support. You need to rely on Enhanced Session Mode, Remote Desktop redirection, or disk passthrough for storage devices.
Start by enabling Enhanced Session Mode in Hyper-V settings. Then connect to your VM and select USB devices under local resources. This allows basic USB devices like flash drives to work inside the virtual machine.
Conclusion
Working with USB in Hyper-V can feel confusing at first, but once you understand its limitations, it becomes much easier to manage. The key is to stop looking for direct passthrough and start using the right method for your situation. Simple tasks work well with Enhanced Session Mode or Remote Desktop. Remember that advanced needs may require disk passthrough or third-party tools.