Dent in Laptop: 14 Easy Ways To Fix It
Fixing a dent in a laptop can be challenging, but it really is not. I have more than a dozen simple methods for you to deal with this problem easily. Each of them are performed by me and I personally recommend all of them.
So, how to fix dent in laptop?
To fix dent in laptop, apply gentle pressure, use a rubber/silicone pad, and try heat-resistant adhesive. Heating or cooling the area can also work in some cases. If the dent is deep, you can also use plunger, vacuum, and filler materials to repair it.
Which repair method to choose depends on the dent’s depth. Don’t worry; I am explaining easy ways to fix a dent, types of dents, how to assess the damage, and preventive tips to avoid facing this problem again.
How to Fix a Dent in laptop? Super Easy Ways
Fixing a laptop dent can involve the application of gentle pressure, use of suction cups or a plunger, and heating or cooling the dented area. Sometimes, using filler material, heat-resistant adhesive, and a rubber pad can work too. For stubborn dents, I recommend seeking professional services.
Apply Gentle Pressure
The first and often most effective method for smoothing out a dent in a laptop is applying gentle pressure. It has worked for me almost every time, but you have to be careful in doing it as this may be the first time you will be repairing a dent with a gente pressure.
This can be a delicate procedure, so here’s a step-by-step guide on how to do it.
- Inspect the Dent: The first step is to thoroughly examine the dent. It will let you know about the size and severity of the dent.
- Prepare Your Workspace: Lay your laptop down on a soft, flat surface to avoid causing additional damage. This will also provide a solid base from which to apply pressure.
- Use a Soft Cloth: Wrap your fingers with a soft cloth or use a microfiber cloth to prevent scratching the laptop surface.
- Apply Pressure: Apply gentle pressure to the dented area. The key here is ‘gentle’ – don’t rush or force the dent out. Start from the edges of the dent and slowly work your way towards the center.
- Check the Progress: Regularly check your progress. If you see the dent beginning to diminish, continue with your approach. If not, increase the pressure slightly.
Once you are done, gently wipe the area to remove any residual marks or fingerprints.
Use a Suction Cup
In cases where the dent is severe or applying gentle pressure hasn’t resolved the issue, I suggest using a suction cup.

Here’s how:
- Clean the Area: Ensure the area around the dent is clean and free of dust or debris. This will maximize the suction cup’s grip.
- Place the Suction Cup: Place a small suction cup (like the ones used for phone or tablet screen repairs) over the dented area.
- Create Suction: Press down on the suction cup to create a vacuum seal. Ensure it is securely attached to the surface.
- Pull Gently: Once a secure seal is created, gently pull the suction cup upwards. Be careful not to pull too hard as it may cause further damage.
- Repeat as Necessary: If the dent doesn’t pop out on the first attempt, repeat the process. It might take a few tries to see significant improvement.
After the dent has been removed, clean the surface again to remove any suction cup marks.
Heat the Area
When all else fails, applying heat can sometimes relax the metal enough to allow a dent to be smoothed out. Here’s how to safely apply heat to your laptop:
- Prepare the Laptop: First, ensure that the laptop is turned off, unplugged, and cool to the touch. Remove the battery if possible.
- Use a Hairdryer: Use a hairdryer on a low setting to gradually heat the dented area. The low setting prevents overheating, which could cause internal damage. Keep the hair dryer moving in a circular motion around the dent, not just in one spot.
- Apply Heat: Continue heating for about a minute or two, then try applying gentle pressure or use the suction cup method again. The heat should make the metal more malleable, thus easier to manipulate.
Once done, allow your laptop to cool down completely before turning it back on. Avoid cooling it rapidly as sudden temperature changes can cause additional damage.
Use a Hot Water Method
I have also found the “Hot water” method to be useful in fixing a dent in your laptop. Here’s how to safely apply this method:
- Protect the Laptop: Before starting, ensure that your laptop is turned off, unplugged, and cool. Remove the battery if possible and tape off the ports and any openings to prevent water from seeping in.
- Prepare Hot Water: Heat water until it is hot, but not boiling. Boiling water may be too hot and cause damage to the laptop’s casing.
- Dampen a Cloth: Soak a cloth in the hot water, then wring it out so it’s damp but not dripping. You want to ensure that no water will accidentally drip into your laptop.
- Apply the Cloth: Place the damp, hot cloth over the dented area. The heat from the water will transfer to the laptop’s casing, making it more malleable.
- Gently Apply Pressure or Use a Suction Cup: As with the previously mentioned methods, now apply gentle pressure or use a suction cup to work the dent out while the casing is still warm.
Once done, check if the dent has been reduced or removed. Repeat the process if needed.
Try Cooling the Area
In some cases, cooling the dented area can be helpful as the contraction of the metal may help it return to its original shape. Here’s how to cool down your laptop safely:
- Prepare Your Laptop: Ensure the laptop is off and unplugged. Remove the battery if possible.
- Use a Can of Compressed Air: Hold a can of compressed air upside down and spray it onto the dented area. This will quickly cool down the area. Remember, do not hold the can too close to the laptop, maintain a distance of around 10-12 inches to prevent damage.
- Apply Gentle Pressure: While the casing is still cold, try applying gentle pressure to the dent. The metal’s contraction might just make it easier to manipulate.
Once you’re done, allow the laptop to return to room temperature naturally. Avoid heating it rapidly, as sudden temperature changes could cause more harm than good.
Utilize a Vacuum Cleaner
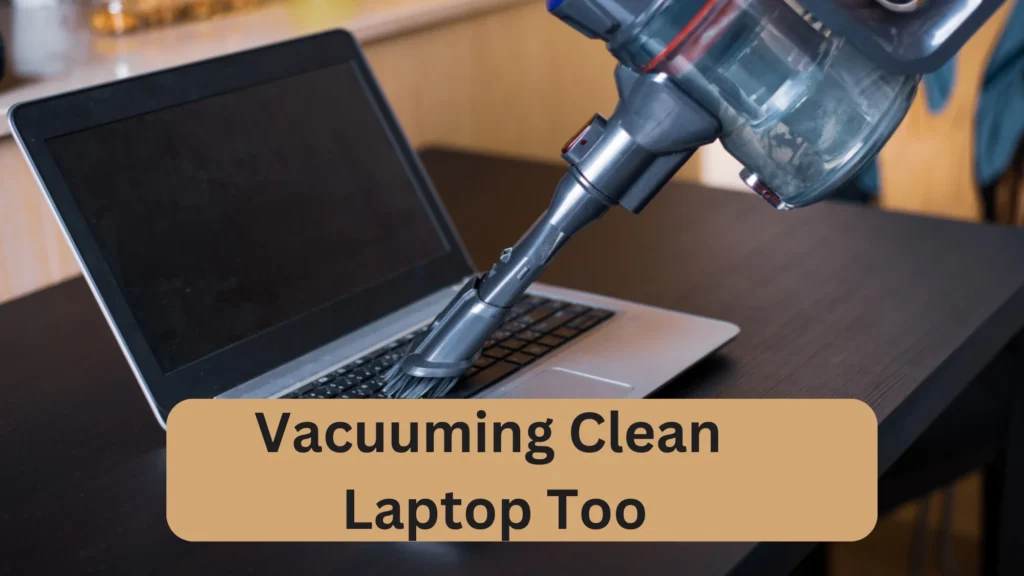
A vacuum cleaner can act as a larger, more powerful suction cup. I was hesitant to use this device to deal with a dent, but it worked like a charm.
Here’s how you can use it for fixing a laptop dent:
- Prep the Laptop: Make sure your laptop is off, unplugged, and cool. Remove the battery if possible.
- Clean the Area: Clean the dented area to ensure there’s no dust or debris that could get sucked into the vacuum cleaner.
- Protect the Laptop: Attach a small plastic nozzle to the vacuum cleaner hose to focus the suction and to prevent damage to the laptop. You can use duct tape to secure the nozzle and create a good seal.
- Apply the Vacuum Cleaner: Hold the nozzle against the dent, then turn on the vacuum cleaner. The suction should pull at the dent.
- Monitor the Process: Keep a close eye on the process to make sure the vacuum cleaner isn’t causing additional damage. If the dent starts to reduce, keep going. If not, try another method.
Once you’re done, clean the area again to remove any marks or debris left behind.
Use a Rubber Mallet or a Hammer
I have also removed a dent by using a rubber mallet or a small hammer wrapped in a soft cloth. However, it’s important for you to proceed with caution, as a misstep could cause more damage.
- Inspect the Dent: Before starting, assess the severity and location of the dent. Understand that this method is most suitable for larger, shallow dents.
- Prepare Your Laptop: Ensure that your laptop is turned off, unplugged, and cool to the touch. Remove the battery if possible.
- Wrap the Hammer: If you’re using a small hammer, wrap it in a soft cloth to prevent direct contact with the laptop’s surface.
- Apply Gentle Blows: Starting at the edges of the dent, gently tap it with the mallet or hammer. The idea is to gradually shape the metal back into place, not to pound it out in one hit.
- Progress Check: Regularly pause to check your progress. If you notice the dent reducing, continue your actions. If not, try adjusting your approach.
Once you’re done, wipe down the area to remove any marks or smudges.
Apply Filler Material
If a dent is too deep to be popped back into place, using a filler material is an option. Note that this method requires precision and patience:
- Clean the Area: Make sure the dented area is clean and dust-free.
- Choose the Filler: Use a high-quality metal filler for best results.
- Apply the Filler: Using a plastic spreader, apply the filler to the dented area. Be sure to press the filler into the dent to ensure there are no air bubbles.
- Let it Dry: Allow the filler to dry completely. This may take a few hours or even overnight depending on the product.
- Sanding: Once dry, use fine-grit sandpaper to sand the area until it’s flush with the rest of the laptop’s surface.
If needed, I suggest painting over the area with a color that matches your laptop.
Use a Dent Removal Tool
Dent removal tools are also effective for reconditioning laptop dents. Here’s a step-by-step guide:
- Preparation: First, make sure the laptop is turned off and unplugged. Remove the battery if possible.
- Choose the Right Tool: There are a variety of dent removal tools available. Select one that fits the size and severity of the dent.
- Apply the Tool: Following the tool’s instructions, apply it to the dent. This usually involves attaching a device to the dent, and then using a mechanism to pop the dent out.
- Monitor the Progress: Keep an eye on the dent as you use the tool. If you see it reducing, continue with what you’re doing. If not, you may need to adjust the tool or try a different method.
After fixing the dent, you should clean the area to get rid of any adhesive residue or marks left by the tool.
Use a Plunger
A common household plunger can sometimes be used to remove a dent from a laptop, especially if the dent is fairly large and shallow.
- Prepare the Laptop: Make sure the laptop is turned off and unplugged. Remove the battery if possible to reduce the risk of electrical issues.
- Clean the Area: Clean the dented area and the base of the plunger. This will ensure a good seal between the two surfaces.
- Apply the Plunger: Position the plunger over the dent and press down to create a vacuum seal.
- Pull the Plunger: Gently pull back on the plunger to try to pop out the dent. If the dent is stubborn, you might need to repeat this process several times.
After the plunger is removed, inspect the area to see if the dent has been fixed.
Use a Heat-Resistant Adhesive
A heat-resistant adhesive can sometimes help in removing a dent. This method is similar to using a suction cup:
- Clean the Dent Area: Start by cleaning the dented area to ensure no dust or particles interfere with the adhesive.
- Apply the Adhesive: Apply a small amount of heat-resistant adhesive to a suction cup or similar object. Then, attach it to the dented area.
- Let it Dry: Allow the adhesive to dry. Refer to the adhesive’s packaging for an appropriate drying time.
- Pull the Suction Cup: Once the adhesive has dried, gently pull the suction cup away from the laptop. The adhesive’s bond, combined with the pulling force, may be enough to remove the dent.
After the dent is removed, clean off the remaining adhesive. It’s important to do this carefully to avoid causing any additional damage to the laptop’s casing.
Apply a Compressed Air Canister
I also prefer using a can of compressed air to cool down and contract the metal. Doing this pops the dent back into place. Here’s how to use this method:
- Preparation: Ensure the laptop is turned off, unplugged, and cool to the touch. Remove the battery if possible.
- Apply Compressed Air: Hold the can of compressed air upside down and carefully spray onto the dented area. This should rapidly cool and contract the metal. Be careful to hold the can a safe distance away from the laptop to prevent damage.
- Apply Pressure or Use Suction: While the metal is still cool, try applying gentle pressure or use a suction method to remove the dent.
- Let it Warm: After the procedure, allow the laptop to naturally come back to room temperature. Avoid heating it rapidly, as sudden temperature changes can damage the metal further.
Use a Rubber or Silicone Pad
Many people also use a rubber or silicone pad to restore a dent in a laptop. Here are the steps:
- Prepare the Laptop: Always begin by ensuring the laptop is off, unplugged, and cool. If possible, remove the battery.
- Position the Pad: Place a rubber or silicone pad directly on the dent.
- Apply Pressure: Apply mild pressure on the pad. The flexibility of the pad helps in pushing the dented metal back into place.
I suggest you periodically lift the pad and check whether the dent is diminishing. If the dent persists, consider using more force or trying another method.
Each of these methods requires patience and gentle handling. If a dent doesn’t budge after a few attempts, it’s probably best to consult with a professional repair service. Attempting to force a stubborn dent out can risk causing more harm than good to your laptop.
See More: What Should You Do When Monitor Slows Down?
Seek Professional Dent Removal Services
If DIY methods fail, or if you’re dealing with a significant dent, I suggest you go for professional help. First, look for a reputable laptop repair service.
After this, you can contact the service to discuss the issue. They’ll give an initial assessment and possibly provide a quote.
Prior to your appointment, it is better if you backup all your important data to avoid any potential loss.
That’s all about how to fix a dent in a laptop easily!
Types of Dents and their Potential Consequences
Laptops, like any other personal devices, can sometimes sustain physical damage such as dents. Depending on their size, location, and severity, these dents can range from purely cosmetic annoyances to serious issues.
Let’s explore the various types of dents and their potential consequences.
Shallow Surface Dents
These are the most common types of dents and are usually caused by minor accidents, like knocking your laptop against a hard surface or dropping something on it. They’re generally shallow and impact only the outer casing of the laptop.
Consequences: Shallow dents are typically cosmetic problems and don’t affect the laptop’s performance. However, they can be unsightly and may reduce the device’s resale value. If the dent has sharp or jagged edges, it could also potentially scratch other surfaces or even cause minor injuries.
Deep Dents
Deep dents are more severe and can be caused by dropping the laptop or by a heavy object falling on it. These dents often distort the laptop’s casing significantly.
Consequences: Deep dents can potentially damage the internal components of the laptop, leading to performance issues. They can affect the cooling system, the fan, the battery, or the hard drive, among other parts. In extreme cases, they can even crack the laptop’s screen. These dents should be addressed as soon as possible to prevent further damage.
Edge and Corner Dents
Dents on the edges or corners of the laptop are common, as these areas are particularly vulnerable to impact.
Consequences: These dents can cause various issues depending on their location. If located near a port, they can obstruct the port’s access, making it difficult or impossible to plug in devices. If near the hinges, they might interfere with the laptop’s ability to open and close properly. Dents on the corners might also affect the alignment of the screen and the keyboard.
Also Read: Why Your Laptop Sometimes Sound Like Jet Engine?
Screen Dents
Dents on the laptop screen are relatively rare, as the screen is usually protected by the laptop’s casing when closed. However, they can occur if something is dropped directly onto an open laptop.
Consequences: A dent on the screen can lead to a range of problems, from minor visual disruptions to major damage. In some cases, the dent may cause a “dead zone” on the screen where pixels no longer display correctly. In severe cases, the dent can cause the screen to crack, making the laptop difficult or impossible to use.
Bottom Panel Dents
The bottom panel of a laptop can also be dented, especially if the laptop is dropped or if it’s frequently placed on rough surfaces.
Consequences: Dents on the bottom panel may not seem as problematic because they’re less visible, but they can still cause issues. These dents can impact ventilation, leading to overheating. If severe enough, they might press against the laptop’s battery or other internal components, causing potential damage.
Each of these types of dents carries its own set of potential consequences, ranging from minor annoyances to significant performance issues. Therefore, it’s important to treat each dent seriously and take appropriate action to repair it. If you’re unsure how to proceed, don’t hesitate to seek professional advice. With careful handling and prompt attention, most dented laptops can be successfully repaired and their lifespan significantly prolonged.
How to Assess the Severity of the Dent
Assessing the severity of a dent is crucial to understand whether it can be fixed at home or requires professional assistance.
Visual Inspection
You should begin with a thorough visual inspection of the dent. This will provide initial clues about its severity.
The location of the dent can often determine its potential impact. A dent on the laptop’s case may not be as severe as one near the screen or ports. Also, dents on the bottom could potentially interfere with ventilation or the internal components.
Evaluate the depth and size of the dent. Shallow and small dents are typically less serious than deep and large ones. A deep dent can potentially harm the laptop’s internal components, whereas a shallow dent is likely to be cosmetic.
Check for Functional Issues
After the visual inspection, check whether the laptop is working as it should. This will help you understand if the dent has affected any of the laptop’s functionalities.
Turn on the laptop and use it as you typically would. Look for signs of slow performance, unusual noise, vibration, or overheating. These could suggest that the dent has damaged some internal components.
If the dent is near the screen, look for dead pixels, discoloration, or any other display issues. A dent on or near the screen could potentially lead to such problems.
If the dent is near a port, try plugging in the corresponding device to see if the port is still functional. Similarly, if the dent is near the hinges, check whether the laptop opens and closes properly.
Understand the Impact on Usability
Sometimes, a dent might not affect the laptop’s performance, but it can make the laptop less comfortable or convenient to use. This can also be considered a form of severity.
If the dent is on the palm rest or other areas where your hands frequently come into contact with the laptop, it could make using the laptop uncomfortable. In such cases, even a small dent could be considered severe.
Dents near the ports, trackpad, or keyboard can make it inconvenient to use the laptop, even if they don’t directly impact performance. Such dents can be seen as severe due to their impact on usability.
Professional Assessment

If you’re unsure about the severity of a dent after your own assessment, or if you’ve identified potential performance issues, it might be wise to seek a professional opinion.
Contact a reputable laptop repair service. Describe the dent and any performance issues you’ve noticed. They might be able to assess the severity based on your description or may ask to inspect the laptop in person.
It’s always better to act sooner rather than later when it comes to potential damage to your laptop. By quickly assessing the situation and taking action, you can help prevent minor issues from becoming major problems.
Preventive Measures for Laptop Care After Fixing the Dent
Once you’ve repaired the dent in your laptop, it’s crucial to take measures to avoid any future dents or damage. The following are some recommended preventive steps you can take to ensure the longevity of your laptop.
Implementing Proper Handling and Transportation Practices
Proper handling and transportation of your laptop are crucial to prevent future dents and other physical damage. Here’s what I suggest:
- Avoid Rough Handling: Always handle your laptop with care. Avoid tossing or dropping it. When opening or closing the lid, use gentle motions.
- Proper Setup and Disassembly: When setting up or packing up your laptop, be mindful not to knock it against any hard surfaces.
- Careful Transportation: Always hold your laptop securely when moving it. When traveling, ensure the laptop is safely stored and not in a position where it could be squashed or knocked around.
Using Laptop Sleeves or Bags for Protection
Laptop sleeves and bags provide an added layer of protection for your laptop during storage and transport. Still, do these three things:
- Choose the Right Size: Your laptop bag or sleeve should fit snugly, without too much extra space, to prevent the laptop from sliding around inside.
- Consider Material: Opt for bags or sleeves with a padded interior for maximum protection.
- Safe Storage: Always keep your laptop in its protective cover when not in use. Even when at home, this can protect it from accidental spills, knocks, or falls.
Avoiding Placing Heavy Objects on the Laptop
Laptops are not built to bear heavy weight. Placing heavy objects on top can cause dents, screen cracks, and damage to internal components. Therefore, I recommend these two points here:
- Keep It Clear: Never use your laptop as a support for other objects. Always keep the area above it clear.
- Store Safely: When not in use, store your laptop in a location where it’s not at risk of having objects placed on top of it or falling on it.
Regular Cleaning and Maintenance
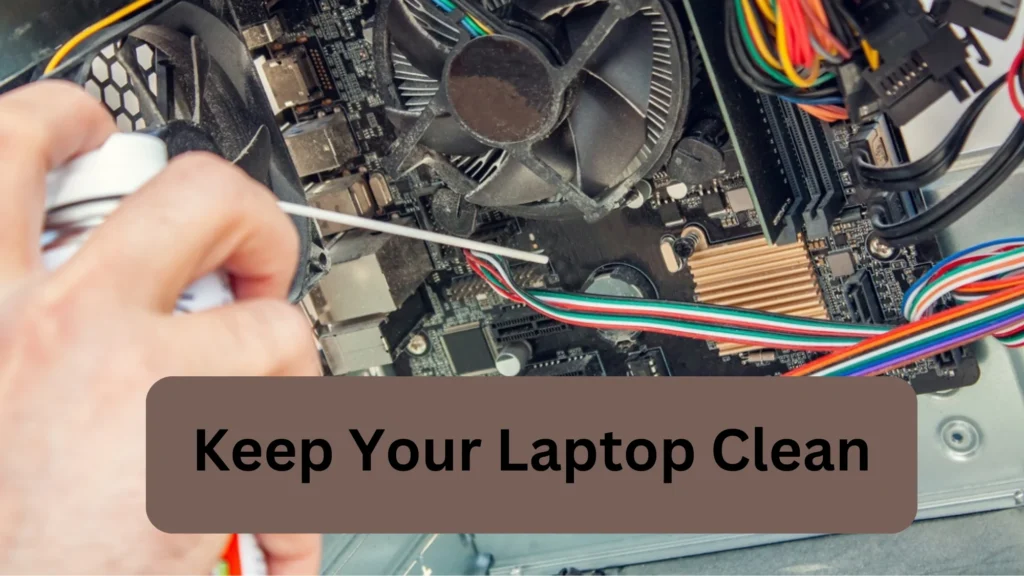
Keeping your laptop clean and well-maintained can help prevent damage and prolong its life. Here, I want you to do these two things:
- Clean Regularly: Use a soft, dry cloth to clean the exterior of your laptop regularly. You can also use compressed air to clean the keyboard and vents.
- Scheduled Maintenance: Consider a professional maintenance service every one to two years. They can check for potential issues and keep your laptop running smoothly.
Using a Laptop Stand
A laptop stand can offer protection, especially for those who use their laptops frequently.
- Improved Stability: A stand can provide a secure base for your laptop, reducing the risk of knocks and spills.
- Increased Ventilation: Many stands elevate the laptop, improving airflow and reducing the risk of overheating.
By following these preventive measures, you can help keep your laptop safe and in good working order for many years to come. Remember that taking a little extra time to care for your laptop can save you the time, money, and stress of dealing with a damaged device down the line.
| Preventive Measures | Importance |
| Proper Handling and Transportation | Reduces risk of accidental dents or knocks |
| Using Laptop Sleeves or Bags | Provides an extra layer of protection |
| Avoid Placing Heavy Objects | Prevents internal damage |
| Regular Cleaning and Maintenance | Keeps the laptop running smoothly |
| Using a Laptop Stand | Offers improved stability and ventilation |
Final Words
So, how to fix dent in laptop?
You can fix dent in laptops by applying gentle pressure or heating the area. Suction cup and filler material methods are also popular in dealing with any physical damages of the laptops.
Here, I explained more than a dozen methods that have worked for me. You can try them and make your device “new” again. After this, keep doing preventive measures so that you don’t face the dent problem again.

